#AndroidStudio ตอนที่ 7 การมีภาพประกอบบทความแบบเป็นพื้นหลัง
และแยกเฟรม เปลี่ยนบทความด้ายการลากซ้ายขวา และเปลี่ยนปุ่มลอยทับ
<introduction>
อารัมภบท
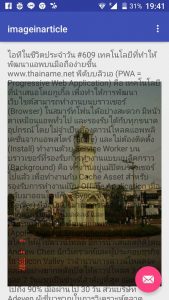
การแสดงข้อมูลก็ต้องมีภาพประกอบสิครับ เป็นเรื่องที่ต่อยอดมาจาก ตอนที่ 5 เล่าเรื่องแสดงข้อมูล และ ตอนที่ 6 เล่าเรื่องแสดงภาพ ตอนนี้จึงนำภาพกับข้อมูลมาแสดงร่วมกัน แต่ตอนนี้เล่าไว้เพียง 2 แบบ คือการแสดงแบบแยกเฟรม กับภาพและข้อความซ้อนกันเหมือนเป็น Background
สิ่งที่น่าสนใจในตอนนี้ คือ การใช้ Navigation แบบลากไปด้านข้างแบบ Swipe Views ผ่าน ViewPager และการใช้ FloatingActionButton ที่ทำให้ปุ่มรอรับคำสั่งเหนือข้อความ เป็นสิ่งที่มีมาใน Tabbed Activity ทำให้หยิบมาใช้ได้เลย ในตอนนี้ผมได้สร้าง layout_main.xml แล้วก็เพิ่ม ScrollView คลุม TextView จะได้เลื่อนขึ้นลงได้ และใช้ FrameLayout แบ่งส่วนว่าส่วนไหนควรแสดงภาพ หรือแสดงบทความ
สรุปกระบวนการได้ 8 ขั้นตอน ประกอบด้วย 1) เลือก Tabbed Activity 2) ทำให้กดเลือกบทความจาก string-array 3) การเปลี่ยนภาพประกอบบทความตามเลข Section 4) สร้าง Layout ใหม่ไว้ใช้งาน 5) ทำให้บทความเลื่อนลงมาผ่าน ScrollView 6) ทำให้กดปุ่ม email แล้วเรียก Layout ใหม่ 7) การเปลี่ยนภาพ email เป็น media_play 8) การใช้ FrameLayout แยกส่วนของภาพ และบทความ
</introduction>
กำลังเล่าเรื่อง การใช้โปรแกรม Android Studio สู่เพื่อนนักพัฒนา ผ่าน Blog
<process>
กระบวนการในการพัฒนา APP
เพื่อแสดงบทความ หรือข้อมูล โดยมีภาพประกอบแบบซ้อนข้อความ และแบ่งเฟรม สามารถเลือกบทความต่อไป หรือข้อความที่เหลือผ่านการลากจอภาพทั้ง Vertical (ScrollView) และ Horizontal (Next Article)
มีขั้นตอน ดังนี้
1. เลือก Tabbed Activity
สร้าง New Project แบบ Tabbed Activity ชื่อ imageinarticle
และมี Navigation Style แบบ Swipe Views (View Page)
ที่ Android Studio เตรียมทั้ง Layout และ Activity มาให้แล้ว
พบว่า ใน Layout มี activity_main.xml และ fragment_main.xml
ทดสอบใช้งานใน Smart phone พบว่า
– หน้าหลักมี icon:email และ icon:Toolbar
– คลิ๊ก email จะมี Notification ขึ้นมาว่า Replace with your own action
– คลิ๊ก Toolbar ที่มุมบนขวา ก็จะพบกับคำว่า Settings
– ลากจอไปด้านซ้าย พบหน้าข้อมูลว่า section 2 และ 3 แล้วลากกลับไปขวาก็จะหยุดที่ section 1
– การแสดงทั้ง 3 หน้าเรียกมาจาก fragment_main.xml แต่ใช้ setText ทำให้ข้อความต่างกัน
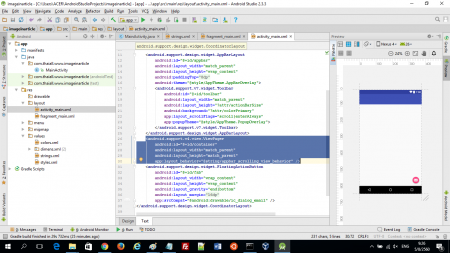
– โดยหน้าควบคุม Navigation คือ activity_main.xml มีโครงสร้าง Layout สรุปดังนี้
<CoordinatorLayout ..>
<AppBarLayout ..><Toolbar ..></Toolbar></AppBarLayout>
<ViewPager />
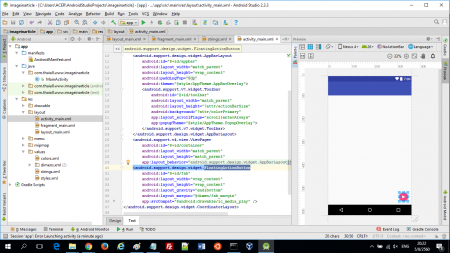
<FloatingActionButton />
</CoordinatorLayout>
ส่วนหน้าเนื้อหา fragment_main.xml มีโครงสร้าง Layout สรุปได้ดังนี้
<RelativeLayout ..>
<TextView.. />
</RelativeLayout>
2. ทำให้กดเลือกบทความจาก string-array
เพื่อให้การทดสอบเห็นผลชัดเจน จึงไปหาบทความมา 3 เรื่อง เป็นตัวอย่างสำหรับทำแอพ
แล้วเปิด strings.xml เพื่อส่งบทความเข้าไปใน tag:string-array ตั้งชื่อว่า data
แล้วไปเปิด MainActivity.java
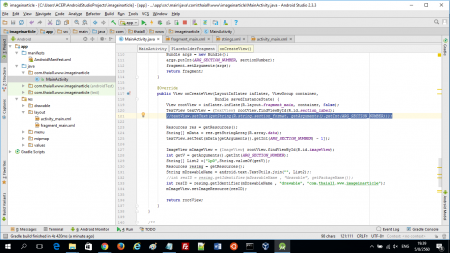
มองหา textView.setText(..) ให้เพิ่ม และ เปลี่ยนเป็น ดังนี้
import android.content.res.Resources;
Resources res = getResources();
String[] mData = res.getStringArray(R.array.data);
textView.setText(mData[getArguments().getInt(ARG_SECTION_NUMBER) – 1]);
ส่วนใน strings.xml ให้นำบทความที่หามาได้ ไปเพิ่มข้อมูลใน strings.xml
<string-array name=”data”>
<item>บทความที่ 611 …</item>
<item>บทความที่ 610 …</item>
<item>บทความที่ 609 …</item>
</string-array>
เพียงเท่านี้บทความทั้ง 3 ก็จะถูกเรียกผ่าน Navigation แบบ ViewPager เรียบร้อยแล้ว
https://gist.github.com/thaiall/4dae3e80398ec868806937fe9ff1e862
3. การเปลี่ยนภาพประกอบบทความตามเลข Section
มีขั้นตอนดังนี้
– เริ่มจากนำภาพ lp01.jpg ถึง lp05.jpg เข้า drawable
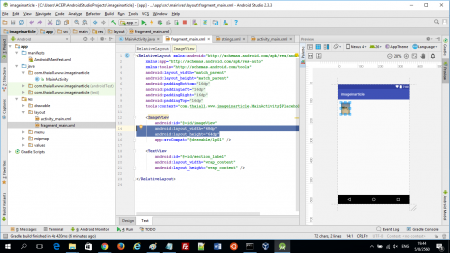
– เพิ่ม ImageView เข้า fragment_main.xml ให้อยู่ก่อน TextView
<ImageView
android:id=”@+id/imageView”
android:layout_width=”wrap_content”
android:layout_height=”wrap_content”
app:srcCompat=”@drawable/lp01″ />
– เปลี่ยนค่า width กับ height จะได้ภาพขนาดเล็กประกอบบทความ เช่น 48dp กับ 64dp
– เพิ่ม code ต่อท้าย textView.setText(..) เพื่อให้ภาพเปลี่ยนไปพร้อมข้อมูล
import android.widget.ImageView;
ImageView mImageView = (ImageView) rootView.findViewById(R.id.imageView);
int getV = getArguments().getInt(ARG_SECTION_NUMBER);
String[] List2 ={“lp0”,String.valueOf(getV)};
Resources resimg = getResources();
String mDrawableName = android.text.TextUtils.join(“”, List2);;
//int resID = resimg.getIdentifier(mDrawableName , “drawable”, getPackageName());
int resID = resimg.getIdentifier(mDrawableName , “drawable”, “com.thaiall.www.imageinarticle”);
mImageView.setImageResource(resID);
https://gist.github.com/thaiall/7db6f8048ec674163d501ca5e0155a0f
4. สร้าง Layout ใหม่ไว้ใช้งาน
อยากได้หน้าใหม่ layout ใหม่สำหรับข้อมูลใหม่
– เข้า strings.xml ไปหาคัดลอกบทความที่ 4 เพิ่มแบบ string ตั้งชื่อว่า data4
– เพิ่มหน้า Layout ใหม่ โดยคลิ๊กขวาใน Project Window
สั่ง New, XML, Layout XML File, “layout_main”
แล้วกด Finish จะได้แฟ้มชื่อ layout_main.xml
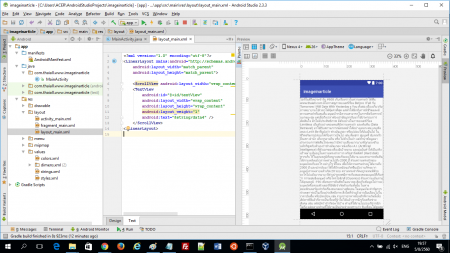
เข้าไปดู Tab:Text ในแฟ้มนี้พบว่ามีเพียง <LinearLayout ..></LinearLayout>
จึงไป Tab:Design แล้วลาก TextView จาก Palette ไปวางใน LinearLayout
แล้วเพิ่มหรือแทนที่คุณสมบัตินี้ android:text=”@string/data4″
5. ทำให้บทความเลื่อนลงมาผ่าน ScrollView
หากทดสอบจะพบว่าข้อมูลเกิน 1 หน้า แต่ Scroll ลงไปข้อมูลส่วนที่เหลือไม่ได้
จึงเพิ่ม ScrollView คลุม TextView ทั้งใน layout_main.xml และ fragment_main.xml
<ScrollView android:layout_width=”wrap_content” android:layout_height=”wrap_content”>
<TextView … ที่นี่ />
</ScrollView>
เมื่อใส่ Tag แล้วก็ทดสอบ Run ข้อมูล 3 หน้า น่าจะเลื่อนลงไปด้านล่างได้แล้ว
ส่วนหน้าใหม่ยังทดสอบไม่ได้ เพราะยังไม่กำหนดให้ layout ใด ๆ ถูกเรียกมาแสดง
https://gist.github.com/thaiall/a2cc3ea288cf98bac57f559a862b1cad
6. ทำให้กดปุ่ม email แล้วเรียก Layout ใหม่
ปรับแก้ปุ่ม email ให้เรียก layout_main.xml ที่สร้างใหม่มาแสดง
แก้ไขโดยทำหมายเหตุ หน้าคำสั่งที่สั่งแสดง Notification
// Snackbar.make(view, “Replace with your own action”, Snackbar.LENGTH_LONG)
// .setAction(“Action”, null).show();
แล้วเพิ่ม method เรียก layout มาแสดง
setContentView(R.layout.layout_main);
7. การเปลี่ยนภาพ email เป็น media_play
ตอนนี้ปุ่ม email ก็มีหน้าที่เรียก layout_main.xml มาแสดงแล้ว
ดูรายการภาพที่คล้าย ic_dialog_email ที่
http://gae.darshancomputing.com/android/1.5-drawables.html
พบ ic_media_play
8. การใช้ FrameLayout แยกส่วนของภาพ และบทความ
ขณะนี้ข้อมูลใน layout_main.xml ยังไม่มีภาพประกอบ
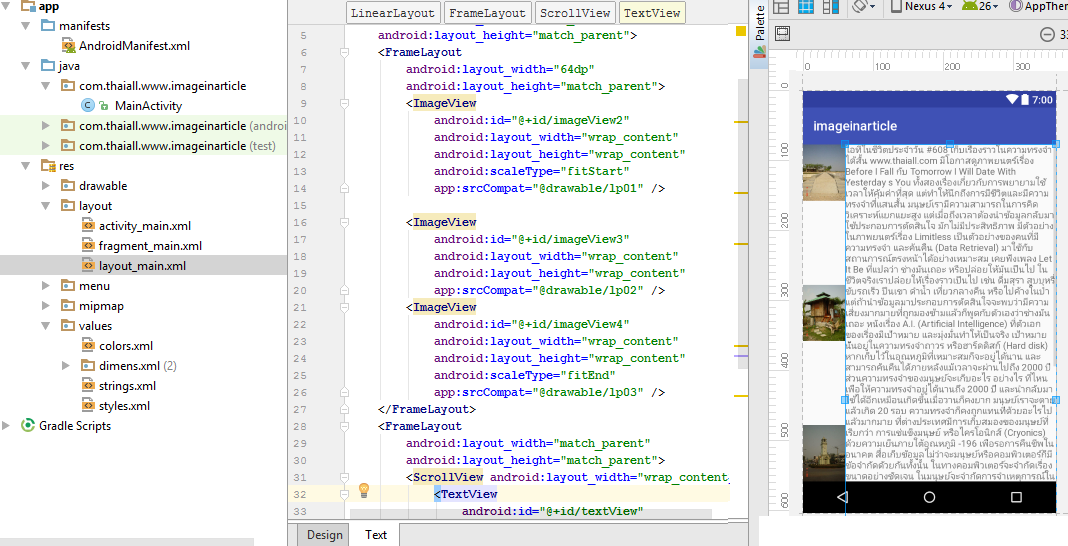
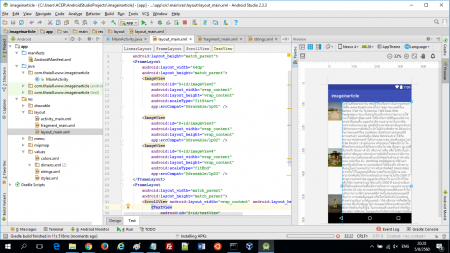
จึงวางแผนว่าจะแบ่งเป็น 2 ซีก คือ ซ้ายกับขวา ให้ซ้ายแสดงภาพ 3 ภาพ
ส่วนขวาเป็นข้อมูลที่ scroll ได้เหมือนเดิม
<LinearLayout..>
<FrameLayout..>
<ImageView.. android:scaleType=”fitStart” />
<ImageView.. />
<ImageView.. android:scaleType=”fitEnd” />
</FrameLayout>
<FrameLayout..>
<ScrollView..><TextView.. /></ScrollView>
</FrameLayout>
</LinearLayout>
https://gist.github.com/thaiall/78ba38a6ef837a5e9bd44c22c1ca0d38
</process>
<website_guide>
+ http://abhiandroid.com/ui/html
+ https://gist.github.com/Kishanjvaghela/
+ https://medium.com/../android-textview-and-image-loading-from-url
+ https://stackoverflow.com/../getdrawable-deprecated-api-22
+ https://stackoverflow.com/../display-inline-images-from-html
+ https://stackoverflow.com/../display-image-in-androids-textview
+ https://developer.android.com/reference/android/text/Html.html
+ http://stacktips.com/tutorials/../display-html-in-android-textview
+ https://developer.android.com/../string-resource.html
+ https://developer.android.com/../arrays.html
+ https://google-developer-training.gitbooks.io/..
+ http://www.thaiall.com/android
</website_guide>
หมายเหตุ
ถ้าสนใจติดตามเนื้อหาในบล็อกนี้ สามารถ subscribe ด้วย email ที่อยู่ข้างขวา หรือ click here
